#laravel .env mysql
Explore tagged Tumblr posts
Visit Tumblr Blog
Explore Tumblr blogs with no restrictions, modern design and the best experience.
Last Seen Tumblr Blogs


Fun Fact
Tumblr has been providing a Korean-language service since 2013.
Text
dizzy Nulled Script 5.0

Download dizzy Nulled Script – The Ultimate Content Monetization Platform Are you looking for a powerful, versatile, and free way to build a revenue-generating platform for content creators? The dizzy Nulled Script is your gateway to launching a full-featured digital marketplace without spending a fortune. With this free script, you can empower creators, sell exclusive content, and generate income—all from a beautifully designed and professionally coded system. What is dizzy Nulled Script? The dizzy is a premium PHP-based solution developed to help users create a content-sharing and monetization platform similar to OnlyFans, Patreon, or Buy Me a Coffee. It allows creators to upload images, videos, stories, and other digital content, offer subscriptions, and interact with their followers through a feature-rich dashboard. Best of all, you can now access the dizzy for free and take full advantage of its powerful tools—without paying for a license. Technical Specifications of dizzy Nulled Script Framework: Laravel 8+ Database: MySQL Frontend: Bootstrap 5, jQuery File Uploads: Amazon S3 and local storage support Payment Gateways: PayPal, Stripe, Bank Transfer, and more Languages: Multi-language support Device Compatibility: Fully responsive on all devices Top Features and Benefits By choosing the dizzy Nulled Script, you’ll gain access to an incredible suite of features that will take your content-sharing platform to the next level: Subscription System: Creators can set monthly fees and offer exclusive content to paying subscribers. Live Notifications: Users receive real-time alerts for messages, follows, and interactions. Private Messaging: Secure one-on-one communication between users and creators. Multi-Currency Support: Sell content globally without limitations. Content Scheduling: Creators can schedule posts for maximum engagement. Monetization Tools: Tips, pay-per-view content, and donation buttons. Who Can Benefit from dizzy Nulled Script? The dizzy Nulled Script is ideal for developers, entrepreneurs, and digital marketers who want to create a personalized space for creators. Whether you’re launching a new niche platform or offering creators a new way to earn, this script offers flexibility, performance, and control. It’s also perfect for influencers, educators, coaches, and artists who want to share exclusive content with a loyal community—and get paid for their creativity. How to Install and Use dizzy Nulled Script Getting started with the dizzy is straightforward, even for beginners. Simply download the package, upload it to your server, and follow the built-in installation wizard. Here's a quick overview: Unzip the downloaded package to your web server directory. Set up a MySQL database and configure your .env file with the appropriate credentials. Run the installation script by visiting your domain. Follow the on-screen instructions to complete setup. Log in to your admin dashboard and start customizing your platform! No advanced coding skills? No problem. The script is well-documented and user-friendly, making it easy to configure even for non-developers. FAQs About dizzy Nulled Script Is dizzy Nulled Script safe to use? Yes, when downloaded from a trusted source, the dizzy Nulled Script is thoroughly tested and secure. Always ensure you're using the latest version for optimal performance and safety. Can I customize the dizzy Script? Absolutely. The script is fully open-source and built on Laravel, giving you full control over its appearance, features, and integrations. Is it legal to use the nulled version? While using a nulled script may violate licensing agreements with the original developer, many users choose to explore nulled options to evaluate the platform before purchasing. We encourage you to support developers if the tool adds value to your business. Conclusion If you’re serious about launching a content monetization platform without the hefty price tag, the dizzy is your ideal solution.
Rich in features, easy to use, and completely free when downloaded from our trusted source, this script will help you build a thriving community of creators and subscribers in no time. Ready to expand your digital toolkit? Explore more nulled plugins to power up your web projects with ease. For an advanced WordPress page builder, check out the elementor nulled pro version—also available for free!
0 notes
Text
Build Portfolio Website in Laravel 11: Your Comprehensive Guide
Building a portfolio website is an essential step for showcasing your skills, projects, and achievements in today's competitive world. Laravel 11, the latest version of the robust PHP framework, offers unparalleled tools and features to create a stunning and functional portfolio website. In this guide, we’ll walk you through the process of building a portfolio website in Laravel 11, ensuring you have a step-by-step roadmap to success.
Why Choose Laravel 11 for Your Portfolio Website?
1. Modern Features
Laravel 11 introduces enhanced routing, improved performance, and advanced tooling that make it the go-to choice for web development.
2. Scalability
Whether you're a freelancer or a business owner, Laravel 11's scalability ensures your website can grow as your portfolio expands.
3. Security
With built-in authentication and security features, Laravel 11 protects your data and provides peace of mind.
4. Community Support
Laravel’s vast community ensures you’ll find solutions to problems, tutorials, and plugins to enhance your website.
Key Features of a Portfolio Website
To build a portfolio website in Laravel 11, ensure it includes:
Homepage: A welcoming introduction.
About Section: Your background and expertise.
Projects: A gallery showcasing your work.
Contact Form: Easy communication.
Blog Section: Share insights and updates.
Responsive Design: Optimized for all devices.
Getting Started with Laravel 11
Step 1: Install Laravel 11
Start by setting up Laravel 11 on your local environment.
composer create-project --prefer-dist laravel/laravel portfolio-website
Step 2: Configure Your Environment
Update your .env file to set up the database and other environment variables.
DB_CONNECTION=mysql
DB_HOST=127.0.0.1
DB_PORT=3306
DB_DATABASE=portfolio
DB_USERNAME=root
DB_PASSWORD=yourpassword
Step 3: Set Up Authentication
Laravel 11 offers seamless authentication features.
php artisan make:auth
This command generates routes, controllers, and views for user authentication.
Step 4: Design Your Database
Create tables for your portfolio items, such as projects, blogs, and user profiles. Use migrations to structure your database.
php artisan make:migration create_projects_table
In the migration file:
Schema::create('projects', function (Blueprint $table) {
$table->id();
$table->string('title');
$table->text('description');
$table->string('image')->nullable();
$table->timestamps();
});
Run the migration:
php artisan migrate
Building the Frontend
Step 1: Choose a CSS Framework
Laravel integrates well with frameworks like Tailwind CSS and Bootstrap. Install Tailwind CSS for modern and responsive designs:
npm install -D tailwindcss
npx tailwindcss init
Configure your Tailwind file and integrate it into your project.
Step 2: Create Blade Templates
Laravel’s Blade templating engine simplifies building dynamic pages. Create a layout file in resources/views/layouts/app.blade.php:
<!DOCTYPE html>
<html>
<head>
<title>@yield('title')</title>
<link rel="stylesheet" href="{{ asset('css/app.css') }}">
</head>
<body>
<div class="container">
@yield('content')
</div>
</body>
</html>
Use this layout in other views:
@extends('layouts.app')
@section('title', 'Home')
@section('content')
<h1>Welcome to My Portfolio</h1>
@endsection
Step 3: Dynamic Content
Fetch portfolio items from the database and display them dynamically using controllers.
public function index() {
$projects = Project::all();
return view('home', compact('projects'));
}
In your Blade template:
@foreach ($projects as $project)
<div class="project">
<h2>{{ $project->title }}</h2>
<p>{{ $project->description }}</p>
<img src="{{ $project->image }}" alt="{{ $project->title }}">
</div>
@endforeach
Advanced Features
1. Search Functionality
Add search to help visitors find specific projects or blogs.
public function search(Request $request) {
$query = $request->input('query');
$projects = Project::where('title', 'LIKE', "%{$query}%")->get();
return view('search-results', compact('projects'));
}
2. File Uploads
Enable uploading images for projects.
public function store(Request $request) {
$request->validate([
'title' => 'required',
'description' => 'required',
'image' => 'nullable|image',
]);
$imagePath = $request->file('image')->store('projects', 'public');
Project::create([
'title' => $request->title,
'description' => $request->description,
'image' => $imagePath,
]);
}
3. Integrate Analytics
Use Google Analytics or similar tools to track visitor behavior.
4. Deploying Your Website
Deploy your Laravel website using platforms like Laravel Forge, AWS, or Heroku. Ensure to optimize the performance with caching and minification.
Optimizing Your Portfolio Website for SEO
Keyword Integration: Use keywords like “Build Portfolio Website in Laravel 11” strategically in titles, meta descriptions, and content.
Fast Loading Times: Optimize images and use caching.
Responsive Design: Ensure compatibility with mobile devices.
Content Strategy: Regularly update your blog to attract organic traffic.
Conclusion
Building a portfolio website in Laravel 11 is an enriching experience that showcases your skills and work to the world. By leveraging the framework’s capabilities and integrating advanced features, you can create a website that stands out in the digital landscape. Start your journey today and make your mark with a professional portfolio website
0 notes
Text
Prevent Sensitive Data Exposure in Laravel: A Complete Guide
In today’s world, safeguarding sensitive data is critical, especially when developing web applications using Laravel. Sensitive data exposure happens when sensitive information such as passwords, API keys, or user details are inadequately protected. Hackers exploit such vulnerabilities, causing severe reputational and financial damage.
In this post, we’ll explore practical steps to mitigate sensitive data exposure in Laravel. Plus, we’ll share a real-world coding example and introduce a free tool to assess your website’s security.

What is Sensitive Data Exposure?
Sensitive Data Exposure refers to a security vulnerability where sensitive information is accidentally exposed due to weak encryption, lack of security best practices, or improper data handling. Common examples include:
Unencrypted sensitive data in transit or at rest
Exposure of user credentials, credit card details, or API keys
Leaks through error messages or misconfigured servers
How to Prevent Sensitive Data Exposure in Laravel
Laravel, being a robust PHP framework, offers several features to secure sensitive data. Let’s dive into the best practices:
1. Use Environment Variables for Sensitive Data
Store sensitive information, such as database credentials or API keys, in the .env file instead of hardcoding them.
Example:
php // config/database.php 'connections' => [ 'mysql' => [ 'host' => env('DB_HOST', '127.0.0.1'), 'database' => env('DB_DATABASE', 'forge'), 'username' => env('DB_USERNAME', 'forge'), 'password' => env('DB_PASSWORD', ''), ], ],
Make sure your .env file is not exposed by adding it to your .gitignore file.
2. Encrypt Sensitive Data
Laravel provides built-in encryption using the Crypt facade. Encrypt sensitive data before saving it to the database.
Example:
php use Illuminate\Support\Facades\Crypt; // Encrypting data $user->secret = Crypt::encryptString('Sensitive Information'); // Decrypting data $decrypted = Crypt::decryptString($user->secret);
3. Use HTTPS Protocol
Always enforce HTTPS for secure data transmission between the server and clients. Laravel makes it easy to redirect HTTP traffic to HTTPS using middleware.
4. Validate User Input
Use Laravel’s validation rules to sanitize and validate user inputs. This ensures attackers cannot inject malicious code into your application.
Example:
php $request->validate([ 'email' => 'required|email', 'password' => 'required|min:8', ]);
5. Regular Security Scans
To ensure comprehensive security, run regular vulnerability assessments. Our tool to test website security free can identify potential weaknesses, including sensitive data exposure.
Here’s an example of what the scan results look like:

Case Study: Coding Example to Protect User Data in Laravel
Let’s walk through a simple example of securely handling user data when building a Laravel application:
php use Illuminate\Support\Facades\Hash; use Illuminate\Support\Facades\Crypt; // Store hashed passwords and encrypt sensitive data $user->password = Hash::make($request->password); $user->ssn = Crypt::encryptString($request->ssn); $user->save(); // Retrieve and decrypt sensitive data $decryptedSSN = Crypt::decryptString($user->ssn);
By following these practices, sensitive data is safeguarded against exposure, even if your database is compromised.
Why Regular Assessments Are Crucial
While secure coding practices reduce vulnerabilities, periodic assessments help identify hidden risks. Conduct a vulnerability assessment using our tool to gain insights into misconfigurations or sensitive data leaks.

Final Thoughts
Sensitive data exposure is a significant threat, but it can be mitigated with robust security practices. Laravel offers powerful tools to safeguard user data, and using a free scanner like ours ensures your website is always secure.
Check your website's security now with our Free Website Security Checker and protect sensitive user data effectively.
#cyber security#cybersecurity#data security#pentesting#the security breach show#laravel#data analysis
0 notes
Text
Deploying Laravel Applications to the Cloud
Deploying a Laravel application to the cloud offers several advantages, including scalability, ease of management, and the ability to leverage various cloud-based tools and services. In this guide, we will explore the steps to deploy a Laravel application to the cloud using platforms like AWS, DigitalOcean, and Heroku. We'll also touch on best practices for server configuration, environment variables, and deployment automation.
1. Preparing Your Laravel Application
Before deploying, it’s essential to ensure that your Laravel application is production-ready. Here are some preparatory steps:
Update Dependencies: Run composer install --optimize-autoloader --no-dev to ensure that only production dependencies are installed.
Environment Configuration: Make sure your .env file is configured correctly for the production environment. You’ll need to set up database connections, cache, queue configurations, and any other service keys.
Caching and Optimization: Laravel provides several optimization commands to boost the performance of your application. Run the following commands to optimize your app for production:bashCopy codephp artisan config:cache php artisan route:cache php artisan view:cache
Assets and Front-End Build: If your application uses frontend assets like JavaScript and CSS, run npm run production to compile them and ensure that assets are optimized.
Database Migration: Make sure your database schema is up to date by running:bashCopy codephp artisan migrate --force
2. Choosing a Cloud Platform
There are several cloud platforms that support Laravel applications, including AWS, DigitalOcean, and Heroku. Let's look at how to deploy on each.
A. Deploying Laravel to AWS EC2
AWS (Amazon Web Services) offers a robust infrastructure for hosting Laravel applications. Here's a high-level overview of the steps:
Launch an EC2 Instance: First, you need to create an EC2 instance running a Linux distribution (e.g., Ubuntu). You can choose the instance size based on your traffic and performance needs.
Install PHP and Required Software: Once the instance is up, SSH into it and install PHP, Composer, Nginx (or Apache), and other necessary services:bashCopy codesudo apt update sudo apt install php php-fpm php-mbstring php-xml php-bcmath php-mysql unzip curl sudo apt install nginx
Configure Nginx: Set up Nginx to serve your Laravel app. Create a new Nginx configuration file under /etc/nginx/sites-available/your-app and link it to /etc/nginx/sites-enabled/.Example configuration:nginxCopy codeserver { listen 80; server_name your-domain.com; root /var/www/your-app/public; index index.php index.html index.htm; location / { try_files $uri $uri/ /index.php?$query_string; } location ~ \.php$ { fastcgi_pass unix:/var/run/php/php7.4-fpm.sock; fastcgi_index index.php; fastcgi_param SCRIPT_FILENAME $document_root$fastcgi_script_name; include fastcgi_params; } error_log /var/log/nginx/error.log; access_log /var/log/nginx/access.log; }
Database Configuration: Set up a MySQL or PostgreSQL database (you can use Amazon RDS for a managed database) and configure your .env file with the correct credentials.
SSL and Security: Secure your application with SSL (using Let's Encrypt or AWS Certificate Manager) and ensure your firewall and security groups are configured correctly.
Deploy Code: You can deploy your Laravel application to EC2 using Git, FTP, or tools like Envoyer or Laravel Forge. For Git deployment, clone your repository and configure your environment variables.
B. Deploying Laravel to DigitalOcean
DigitalOcean provides a simple and cost-effective way to host Laravel applications. Here’s how to deploy:
Create a Droplet: Log into your DigitalOcean account and create a new Droplet with a suitable operating system (typically Ubuntu).
Install PHP, Nginx, and Composer: SSH into your droplet and install the necessary dependencies for your Laravel app:bashCopy codesudo apt update sudo apt install php php-fpm php-mbstring php-xml php-bcmath php-mysql unzip curl sudo apt install nginx
Configure Nginx and Laravel Application: Configure Nginx to point to your Laravel application’s public folder and set up SSL.
Database Configuration: Set up MySQL or PostgreSQL on your droplet, then configure the .env file for your database credentials.
Deploying the Code: You can either deploy your code via Git or use an automation tool like Envoyer to streamline deployments. You’ll also need to configure file permissions for storage and cache directories.
C. Deploying Laravel to Heroku
Heroku is an excellent choice for quick and easy Laravel application deployment with minimal configuration. Here’s how you can deploy a Laravel app on Heroku:
Create a Heroku App: Sign up or log into your Heroku account and create a new app. This will automatically provision a server for you.
Install Heroku CLI: Install the Heroku CLI on your local machine if you haven't already:bashCopy codecurl https://cli-assets.heroku.com/install.sh | sh
Configure the .env File for Heroku: Heroku uses environment variables, so make sure you configure your .env file correctly or set them directly in the Heroku dashboard.
Deploy the Code: Push your code to Heroku using Git:bashCopy codegit push heroku master
Database Configuration: Heroku offers a managed PostgreSQL database that you can provision with the command:bashCopy codeheroku addons:create heroku-postgresql:hobby-dev
Run Migrations: Run database migrations on Heroku with:bashCopy codeheroku run php artisan migrate
3. Automating Deployment with Laravel Forge or Envoyer
For smoother deployment management, you can use tools like Laravel Forge or Envoyer.
Laravel Forge: Laravel Forge is a server management and deployment service designed for PHP applications. It automates tasks like server provisioning, security updates, and Laravel deployments to platforms like AWS, DigitalOcean, and others.
Envoyer: Envoyer is a zero-downtime deployment tool that ensures your Laravel app is deployed with no interruption to your users. It handles the deployment process seamlessly, ensuring the application is running smoothly at all times.
4. Conclusion
Deploying a Laravel application to the cloud can seem daunting, but it becomes easier with tools and services that automate much of the process. Whether you choose AWS, DigitalOcean, or Heroku, each platform offers unique benefits for hosting your Laravel application. Using automation tools like Forge and Envoyer, you can further streamline the deployment process, ensuring your app runs smoothly and efficiently in the cloud.
0 notes
Text
How to deploying Laravel projects on a live server – Complete Step-by-Step Guide
Learn How to deploying Laravel projects on a live server with this comprehensive guide. Step-by-step instructions on setting up hosting, configuring files, and deploying your Laravel app smoothly.Read Laravel Docs
How to deploying Laravel projects on a live server, you’ll need to follow a structured process. Here’s a step-by-step guide to help you:

1. Purchase Domain and Hosting
Make sure you have a domain and a hosting plan. Most shared hosting plans (like cPanel-based ones) or a VPS will work for Laravel, but ensure your server supports PHP and MySQL and meets Laravel’s requirements (PHP version, required extensions, etc.).
2. Prepare Your Laravel Project
Make sure your Laravel project is working locally.
Run the following command to clear any cached configuration and to optimize the project:
php artisan cache:clear
php artisan config:clear
php artisan route:clear
php artisan view:clear
Set up your environment variables (.env file). Make sure they are correctly configured for the live server (e.g., database, mail, and app URL settings).
3. Zip and Upload Your Laravel Project
Compress your entire Laravel project folder (without the node_modules and vendor directories) into a .zip file.
Use FTP (with FileZilla or any other FTP client) or File Manager in cPanel to upload the .zip file to your server. Typically, upload the file to the public_html or a subdirectory within it if you want to run your Laravel app in a subdirectory.
4. Extract the Files
Once uploaded, use File Manager in your hosting control panel to extract the .zip file.
5. Set Up the Public Directory
By default, Laravel’s entry point is the public folder, which contains the index.php file. On a shared hosting server:
Move everything in the public folder (including the .htaccess and index.php files) to the root directory (usually public_html).
Edit the index.php file to update the paths:
Change:
require __DIR__.'/../vendor/autoload.php';
$app = require_once __DIR__.'/../bootstrap/app.php';
To:
require __DIR__.'/vendor/autoload.php';
$app = require_once __DIR__.'/bootstrap/app.php';
This ensures that Laravel can find the necessary files in the correct directory.
6. Set File Permissions
Ensure that the following directories are writable by the server:
/storage
/bootstrap/cache
Use the following command via SSH (if available) or through the hosting file manager:chmod -R 775 storage chmod -R 775 bootstrap/cache
7. Set Up a Database
Create a MySQL database and a user with privileges in cPanel (or via SSH if using VPS).
Update the .env file with your database credentials:
DB_HOST=localhost DB_DATABASE=your_database_name DB_USERNAME=your_database_username DB_PASSWORD=your_database_password
8. Install Composer Dependencies
If you have SSH access:
SSH into your server using a terminal or a tool like PuTTY.
Navigate to your project directory
cd /path/to/your/project
Run Composer to install the dependencies:
composer install --optimize-autoloader --no-dev
If you don’t have SSH access, you can run composer install locally, zip the vendor folder, and upload it to the server.
9. Run Migrations
If you have SSH access, run the following command to migrate the database:
php artisan migrate --force
If you don’t have SSH access, you can run the migrations locally and then export/import the database to the server via phpMyAdmin.
10. Set App Key
Generate a new application key if you haven’t already:php artisan key:generate
Ensure the key is set in the .env file:
Read Full Tutorials
0 notes
Text
How To Get Started With Laravel? — A Beginner’s Guide By Sohojware
Laravel, a free, open-source PHP web framework, has become popular worldwide for web developers. Laravel streamlines development by providing a robust foundation for building modern web applications. This comprehensive guide from Sohojware, a leading US-based software development company, will equip you with the essential knowledge to embark on your Laravel development journey.
Why Choose Laravel?
There are many reasons why Laravel stands out in the world of web frameworks. Here are a few key benefits:
Elegant MVC Architecture: Laravel enforces the Model-View-Controller (MVC) design pattern, promoting clean code separation and maintainability. This structure makes your code easier to understand, test, and scale as your application grows.
Object-Oriented Approach: Built on top of PHP’s object-oriented capabilities, Laravel fosters code reusability and promotes a well-organized development workflow.
Built-in Features: Laravel comes packed with a plethora of pre-built functionalities, including authentication, authorization, routing, caching, database management, and more. This saves you time and effort by eliminating the need to develop these features from scratch.
Artisan CLI Tool: Laravel’s powerful command-line interface (CLI) tool, Artisan, simplifies common development tasks like generating models, migrations, controllers, and other boilerplate code. This speeds up development significantly.
Active Community and Ecosystem: Laravel boasts a large and active community of developers who contribute to its continuous improvement. This ensures access to extensive documentation, tutorials, and readily available packages for various functionalities.
Getting Started with Laravel
Now that you’re convinced about the advantages of Laravel, let’s delve into the steps to get you started:
1. Prerequisites:
Before diving into Laravel development, ensure you have the following tools installed on your system:
PHP (version 7.4 or later): Download and install the latest version of PHP from the official website (https://www.php.net/downloads/).
Composer: Composer is a dependency manager for PHP. Follow the installation instructions on the Composer website (https://getcomposer.org/).
2. Install Laravel:
There are two primary methods for installing Laravel:
Method 1: Using Composer:
Open your terminal and navigate to your desired project directory. Then, run the following command:
Bash

Replace “your-project-name” with your preferred application name. This command will create a new Laravel project directory with all its dependencies installed.
Method 2: Using Laravel Installer:
If you don’t have Composer installed, you can download the Laravel installer from the official website ([invalid URL removed]). Once downloaded, execute the following command in your terminal:
Bash

3. Set Up Database:
Laravel utilizes a database to store application data. You can choose from various database management systems like MySQL, PostgreSQL, or SQLite. Configure your database credentials in the .env file located at the root of your project directory.
4. Start the Development Server:
Laravel provides a built-in development server to run your application locally. Navigate to your project directory in the terminal and execute the following command to start the server:
Bash

This will typically launch your application at http://localhost:8000 in your web browser.
5. Explore the Project Structure:
Laravel adheres to a well-defined directory structure, making locating and managing different application components easy. Take some time to familiarize yourself with the key directories like app, config, public, resources, and routes, each serving specific functionalities.
Building Your First Laravel Application
Now that you have a basic Laravel setup, let’s create a simple application to demonstrate its functionalities. We’ll build a basic blog system where users can view a list of posts.
1. Create a Model:
A model represents the data structure of your application. To create a model for posts, run the following Artisan command in your terminal:
Bash
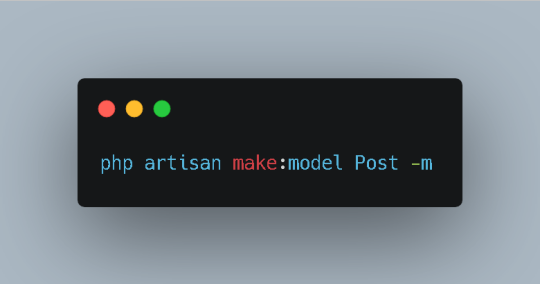
This command generates a Post.php file within the app directory. Modify this file to define the attributes associated with a post, such as title, content, and author.
2. Create a Migration:
A migration is a version control system for your database. It allows you to define changes to your database schema and easily roll them back if necessary. To create a migration for the Post model, run the following Artisan command:
Bash
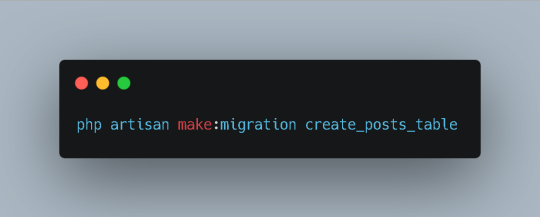
This will generate a new migration file within the database/migrations directory. Open the file and add the necessary columns to the up method. For example:
PhP
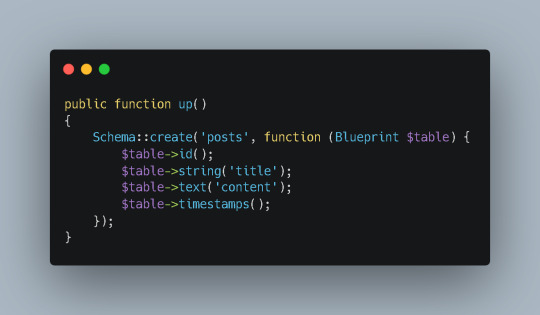
3. Run the Migration:
To apply the changes defined in the migration to your database, run the following command:
Bash
This will create the posts table in your database.
4. Create a Controller:
A controller handles user requests and interacts with your models. To create a controller for managing posts, run the following Artisan command:
Bash

This will generate a PostController.php file within the app/Http/Controllers directory. Inside the controller, define methods to handle different actions, such as displaying a list of posts, creating a new post, and editing or deleting existing posts.
5. Define Routes:
Routes map URLs to specific controller actions. To define routes for your blog application, open the routes/web.php file and add the following code:
Php

This route will map the root URL (http://localhost:8000) to the index method of the PostController class.
6. Create a View:
Views are responsible for rendering HTML content. To create a view for displaying the list of posts, run the following Artisan command:
Bash
This will generate a posts/index.blade.php file within the resources/views directory. Inside the view, write the HTML code to display the list of posts.
7. Complete the Controller:
In the index method of the PostController, retrieve the list of posts from the database using the Post model and pass it to the view:
PhP

8. Test Your Application:
Access http://localhost:8000 in your web browser to see the list of posts displayed on the page.
Conclusion
This guide has provided you with a solid foundation for getting started with Laravel. By following these steps and exploring the framework’s rich features, you can efficiently build robust and scalable web applications. Remember, practice is key to mastering Laravel. Start experimenting with different features and building your own projects to enhance your skills.
FAQs
What is the difference between Laravel and CodeIgniter?
Laravel and CodeIgniter are both popular PHP frameworks, but they have distinct approaches and features. Laravel emphasizes convention over configuration and provides a more expressive syntax, while CodeIgniter offers a more lightweight and flexible structure. The choice between the two often depends on project requirements and developer preferences.
Can I use Laravel for large-scale applications?
Absolutely! Laravel is designed to handle complex and high-traffic applications. Its robust architecture, scalability features, and active community support make it a suitable choice for enterprise-level projects.
How does Laravel compare to other popular frameworks like Symfony and Yii?
Laravel, Symfony, and Yii are all powerful PHP frameworks with their own strengths and weaknesses. Laravel is known for its ease of use and expressive syntax, Symfony offers a more modular and customizable approach, and Yii emphasizes performance and efficiency. The best framework for your project depends on your specific needs and preferences.
Does Sohojware offer Laravel development services?
Yes, Sohojware provides professional Laravel development services. Our team of experienced developers can help you build custom Laravel applications tailored to your business requirements.
How can I learn Laravel more effectively?
The best way to learn Laravel is through hands-on practice and experimentation. Start by following tutorials and building small projects. As you gain confidence, gradually tackle more complex applications. Additionally, consider joining online communities and forums where you can connect with other Laravel developers and seek help when needed.
1 note
·
View note
Text
estrutura de um BLOG
Para criar um site com serviço (frequentemente referido como um site web com backend) moderno e escalável, você precisa considerar a estrutura em várias camadas, incluindo frontend, backend, banco de dados, e infraestrutura. Aqui está uma visão geral da arquitetura típica de um site com serviço:
1. Frontend (Cliente)
O frontend é a parte visível do site com a qual os usuários interagem diretamente. Pode ser desenvolvido usando várias tecnologias:
HTML: Linguagem de marcação para estruturar o conteúdo da web.
CSS: Folhas de estilo para estilizar o conteúdo HTML.
JavaScript: Linguagem de programação para adicionar interatividade e dinamismo ao site.
Frameworks e Bibliotecas: React, Angular, Vue.js para desenvolver interfaces de usuário dinâmicas e responsivas.
2. Backend (Servidor)
O backend é a parte do site que processa a lógica do servidor, gerencia dados e responde às solicitações dos clientes. Ele pode ser desenvolvido usando várias linguagens e frameworks:
Linguagens de Programação: Python, JavaScript (Node.js), Java, Ruby, PHP, etc.
Frameworks: Django (Python), Flask (Python), Express (Node.js), Spring (Java), Ruby on Rails (Ruby), Laravel (PHP), etc.
APIs: A criação de APIs (RESTful ou GraphQL) para comunicação entre o frontend e o backend.
3. Banco de Dados
O banco de dados armazena os dados do site. A escolha do banco de dados depende dos requisitos do projeto:
Relacionais (SQL): MySQL, PostgreSQL, Oracle Database, Microsoft SQL Server.
Não Relacionais (NoSQL): MongoDB, Redis, DynamoDB, Cassandra.
4. Infraestrutura
A infraestrutura refere-se ao ambiente onde o site é hospedado e como ele é gerenciado e escalado:
Servidores e Hospedagem: AWS, Google Cloud, Azure, DigitalOcean, Heroku, etc.
Containers e Orquestração: Docker para containerização e Kubernetes para orquestração de containers.
CI/CD (Integração Contínua/Entrega Contínua): Jenkins, Travis CI, CircleCI, GitHub Actions para automatizar o pipeline de desenvolvimento e implantação.
5. Segurança
A segurança é crítica em todas as camadas da arquitetura do site:
Autenticação e Autorização: OAuth, JWT, Passport.js.
Certificados SSL/TLS: Para criptografar a comunicação entre o cliente e o servidor.
Proteção contra Ataques: Proteção contra SQL injection, XSS, CSRF, etc.
6. Serviços e Funcionalidades Adicionais
Para adicionar funcionalidades e melhorar a experiência do usuário, você pode integrar vários serviços adicionais:
Serviços de Cache: Redis, Memcached para melhorar o desempenho do site.
Serviços de Mensageria: RabbitMQ, Apache Kafka para comunicação assíncrona.
CDN (Content Delivery Network): Cloudflare, Akamai para distribuir conteúdo e melhorar a velocidade de carregamento.
Exemplo de Estrutura de Projeto
Aqui está um exemplo simplificado de como os arquivos e diretórios podem ser organizados em um projeto típico
├── frontend/
│ ├── public/
│ │ └── index.html
│ ├── src/
│ │ ├── components/
│ │ ├── pages/
│ │ ├── App.js
│ │ └── index.js
│ ├── package.json
│ └── webpack.config.js
├── backend/
│ ├── src/
│ │ ├── controllers/
│ │ ├── models/
│ │ ├── routes/
│ │ ├── services/
│ │ └── app.js
│ ├── .env
│ ├── package.json
│ └── server.js
├── database/
│ └── schema.sql
├── docker-compose.yml
├── Dockerfile
├── README.md
└── .gitignore
Descrição dos Diretórios e Arquivos
frontend/: Contém todo o código do frontend.
public/: Arquivos públicos como index.html.
src/: Código fonte do frontend (componentes React/Vue/Angular).
backend/: Contém todo o código do backend.
controllers/: Lida com a lógica das requisições.
models/: Definições dos modelos de dados.
routes/: Definições das rotas da API.
services/: Serviços de negócios e integração com APIs externas.
app.js: Arquivo principal da aplicação.
database/: Scripts de banco de dados.
schema.sql: Definição do esquema do banco de dados.
docker-compose.yml: Arquivo de configuração do Docker Compose para orquestrar serviços.
Dockerfile: Instruções para construir a imagem Docker do projeto.
README.md: Documentação do projeto.
.gitignore: Arquivo para especificar quais arquivos/diretórios devem ser ignorados pelo Git.
Essa estrutura e essas tecnologias podem variar dependendo das necessidades específicas do seu projeto, mas fornecem uma boa base para construir um site com serviço moderno e escalável.
0 notes
Text
Building a Realtime Chat Bot With Laravel

In today's digital age, chatbots have revolutionized how businesses interact with customers and streamline their operations. This blog post will provide a concise overview of chatbots and emphasize their pivotal role in enhancing customer service and efficiency. Additionally, we'll explore the relevance of using Laravel, a popular PHP web application framework, in chatbot development. Lastly, we'll discuss the primary purpose of this blog post – guiding you on how to hire Laravel developers to build your chatbot solution.
Chatbots, also known as virtual assistants or conversational agents, are software programs designed to mimic human conversation. Their importance lies in their ability to provide instant, 24/7 assistance, significantly improving user experiences and streamlining various business processes.
It’s renowned for its developer-friendly features and versatility, and serves as an excellent choice for building chatbots. Its modular architecture, extensive libraries, and expressive syntax make it the perfect framework for creating intelligent and responsive chatbot applications.
Let's discuss how to hire Laravel developers for chatbot development. You'll clearly understand why chatbots are essential, how it can empower your chatbot project, and the steps to hire a proficient Laravel developer who can bring your chatbot vision to life. Whether you're looking to enhance customer service or automate tasks, hiring the right Laravel developer is the key to success.
Getting Started with Laravel Development
Before diving into the world of development, ensuring you have the proper prerequisites to set yourself up for success is essential. Let's provide you with a brief overview of the essentials:
1. Tools and Technologies:
Text Editor/IDE: Choose a text editor or integrated development environment (IDE) you're comfortable with, such as Visual Studio Code, PhpStorm, or Sublime Text.
Web Server: Laravel applications typically run on a web server. You can use Apache, Nginx, or its built-in development server for local testing.
Database: Laravel supports various databases, including MySQL, PostgreSQL, SQLite, and SQL Server. Set up and configure the database system you prefer.
2. Basic Knowledge:
Laravel Fundamentals: It's crucial to have a solid grasp of its core concepts, such as routing, controllers, models, views, migrations, and Eloquent ORM. Its official documentation is an excellent resource for learning these fundamentals.
PHP: Since Laravel is a PHP framework, a good understanding of PHP programming is essential. Familiarize yourself with PHP syntax, data types, functions, and object-oriented programming (OOP) principles.
With these prerequisites in place, you'll be well-prepared to embark on your Laravel development journey and create web applications that leverage the power and elegance of this popular PHP framework.
Setting Up Laravel
When it comes to providing top-notch Laravel development services, correctly setting up your development environment is the crucial first step. Let's walk through the essential tasks to get you up and running smoothly:
1. Installing Laravel:
To kickstart your development journey, you'll need to install Laravel globally on your system. You can do this using Composer, a dependency manager for PHP. Execute the subsequent command to install it:

This command ensures you have the Laravel command-line tool available, making it easy to create new Laravel projects.
2. Configuring the Environment:
It relies on a robust configuration system. Key settings, such as database connections, environment variables, and application-specific settings, are defined in the .env file. Configure this file with your specific environment details, like database credentials and app keys. Proper configuration is essential for the security and functionality of your Laravel application.
3. Setting Up the Database:
It supports multiple database systems, allowing you to choose the best fit for your project's needs. To configure your database connection, update the .env file with your database type, host, port, username, and password. Afterwards, run the following command to create the database tables:

This will ensure your database is ready to store data for your Laravel application.
By following these steps and setting up correctly, you're well on your way to providing exceptional Laravel development services. This foundation will empower you to create robust web applications and deliver high-quality solutions to your clients or users.
Building a ChatBot with Expertise
Having a well-structured plan is vital when you're on a mission to create a cutting-edge chatbot. Here's a step-by-step guide to help you navigate the development process, ensuring your chatbot operates flawlessly:
A. Designing the Chat Bot's Architecture:
Start by carefully crafting the architecture of your chatbot. Define its components, such as the messaging engine, database structure, and user management system. A well-thought-out architecture sets the stage for a robust and scalable chatbot.
B. Implementing User Authentication:
Security is paramount. Implement user authentication to safeguard user data and control access to your chatbot. Laravel development agency, with its built-in authentication system, can simplify this process for you.
C. Building the Chat Interface:
Create an engaging and user-friendly chat interface. Design matters here, as it directly impacts user interaction and satisfaction.
D. Integrating a Real-time Messaging System:
To achieve seamless, real-time communication, integrate a messaging system. You can leverage technologies like WebSockets to enable instant message delivery and updates.
E. Handling User Messages and Responses:
Developing mechanisms to handle user messages and responses efficiently involves processing and storing messages, ensuring they reach the intended recipients, and managing message history.
F. Implementing Chat Bot Logic:
The heart of your chatbot lies in its logic. Define how your chatbot understands and generates responses. Incorporate natural language processing (NLP) and machine learning (ML) algorithms for intelligent interactions.
As you embark on this exciting journey, consider enlisting the expertise of a Laravel development agency. Their experience with its capabilities can supercharge your chatbot development, ensuring it's functional, scalable, and maintainable. Together, you can create a chatbot that stands out in the ever-evolving digital communication landscape.
Testing Your Laravel Chat Bot for Optimal Performance
As you tread the path of Laravel development in building your chatbot, testing is a crucial phase that should never be overlooked. Let's explore the significance of testing and understand the different testing approaches:
A. Discussing the Importance of Testing:
Testing is the cornerstone of delivering a reliable and efficient chatbot. It ensures that your application functions as intended, providing a seamless experience to users. Testing also helps identify and rectify issues before they reach your audience, saving time and maintaining your chatbot's reputation.
B. Explaining Unit Tests and Integration Tests:
In Laravel development, testing involves two primary types: unit tests and integration tests.
Unit Tests: These focus on individual components or functions of your chatbot in isolation. They validate that each part of your codebase works correctly.
Integration Tests: These come into play when examining how different components interact. Integration tests verify that your chat bot's modules integrate smoothly and harmoniously.
C. Providing Code Examples for Testing the Chat Bot:
Let's dive into some code examples to illustrate the testing process in Laravel. Here's a basic example of a unit test for a chatbot controller:
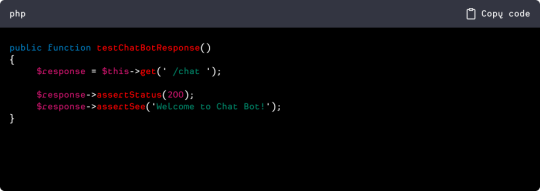
In this example, we're testing if the chatbot responds as expected when a user accesses the chat page.
By conducting comprehensive testing throughout your Laravel chatbot development, you ensure higher reliability and performance. It's a critical step in delivering a polished and user-friendly chatbot that meets the expectations of your audience.
Efficient Deployment for Your Chat Bot: A Laravel Development Company's Approach
The deployment phase takes center stage once your chatbot is ready to shine. It's time to prepare your application for production and make it accessible to users worldwide. Here's a concise guide on how to navigate this crucial phase:
Preparing the Application for Production:
Before deploying your chatbot, it's essential to ensure that your application is production-ready, optimizing performance, enhancing security measures, and fine-tuning configurations to handle real-world traffic efficiently. It's a step where the expertise of a Laravel development company can be invaluable, ensuring your application is primed for success.
Choosing a Hosting Platform:
Selecting the right hosting platform is a pivotal decision in the deployment process. Your choice should align with your chatbot's requirements, including scalability, uptime, and budget considerations. Popular options for Laravel applications include shared hosting, Virtual Private Servers (VPS), cloud platforms like AWS or Azure, and dedicated hosting. Each has its merits, and the ideal choice depends on your needs.
Deploying the Chat Bot on a Server:
Once you've picked your hosting platform, it's time to deploy your Laravel chatbot to a server. The deployment process typically involves uploading your codebase, configuring server settings, and setting up a database. Its documentation provides detailed guidance on deploying applications, ensuring a smooth transition from development to a live, accessible chatbot.
A Laravel development company can play a pivotal role in this deployment journey, leveraging its expertise to make the process seamless and efficient. Their experience ensures that your chatbot goes live with minimal hiccups, delivering a reliable and performant solution to your users.
Efficient Scaling and Maintenance for Your Chat Bot
Scaling and maintenance are pivotal aspects of ensuring your chatbot's continued success. Here's a comprehensive look at strategies to scale and maintain your chatbot effectively:
Strategies for Scaling the Chat Bot:
As your chatbot gains popularity and user engagement grows, it's crucial to have a scalable strategy.
Load Balancing: Implement load balancing to distribute incoming traffic evenly across multiple servers, ensuring your chatbot remains responsive even during peak usage.
Auto-scaling: Leverage cloud hosting platforms that offer auto-scaling capabilities. Your infrastructure can automatically adjust to handle increased traffic, providing a seamless user experience.
Regular Maintenance and Updates:
Regular maintenance is essential to keep your chatbot running smoothly and securely.
Software Updates: Keep your Laravel framework and other dependencies up to date, including security patches and feature enhancements.
Database Optimization: Periodically optimize your database to improve query performance and reduce response times.
Bug Fixes: Address and fix any bugs or issues users report promptly.
Handling User Feedback and Improving the Chat Bot:
User feedback is invaluable for enhancing your chatbot's functionality and user experience.
Feedback Channels: Establish clear channels for users to provide feedback, such as in-app forms or contact information.
Feedback Analysis: Regularly analyze user feedback to identify common issues, pain points, or feature requests.
Iterative Development: Use feedback to inform iterative development cycles. Continuously enhance your chatbot based on user input, ensuring it evolves to meet changing needs.
By implementing these strategies, you can ensure that your chatbot scales gracefully to accommodate growing user bases and maintains its reliability and relevance over time. This proactive approach fosters a positive user experience and establishes your chatbot as a trusted and valuable resource.
Conclusion
In this journey through chatbot development, we've explored various aspects crucial to creating successful and impactful chatbots. From understanding the importance of chatbots in enhancing user experiences to harnessing the power of Laravel development, we've covered a spectrum of insights.
We've delved into setting up the foundation, testing for reliability, and deploying your chatbot for the world to experience. Scaling and maintaining your chatbot have also been discussed as vital steps to ensure its long-term success.
We encourage you to delve deeper into chatbot development as we wrap up. The world of conversational AI is ever-evolving, offering exciting opportunities to create solutions that streamline processes and connect with users in new and innovative ways.
We sincerely thank you for your time and interest in this blog post. Your curiosity and passion for technology drive the industry forward, and we hope this information has been valuable in your quest to explore the fascinating world of chatbot development. Stay curious, keep learning, and continue to create solutions that make a difference!
Source: https://www.addwebsolution.com/blog/building-realtime-chat-bot-laravel
#laravel development company#laravel development services#hire laravel developer#laravel app development company#certified laravel developer
0 notes
Photo
Deploy laravel project with docker swarm We check three major step in this guide Setup laravel project with docker compose Deploy the stack to the swarm Create gitlab-ci Setup laravel project with docker compose we will explore the process of deploying a laravel project using docker swarm and setting up a CI/CD pipline to automate the deployment process. Now let’s start with containerize a laravel project with docker compose we need three separate service containers: An app service running PHP7.4-FPM; A db service running MySQL 5.7; An nginx service that uses the app service to parse PHP code Step 1. Set a env variable in project In root directory of project we have .env file now we need to update some variable DB_CONNECTION=mysql DB_HOST=db DB_PORT=3306 DB_DATABASE=experience DB_USERNAME=experience_user DB_PASSWORD=your-password Step 2. Setting up the application’s Docekrfile we need to build a custom image for the application container. We’ll create a new Dockerfile for that. Docker file FROM php:7.4-fpm # Install system dependencies RUN apt-get update && apt-get install -y \ git \ curl \ libpng-dev \ libonig-dev \ libxml2-dev \ zip \ unzip # Clear cache RUN apt-get clean && rm -rf /var/lib/apt/lists/* # Install PHP extensions RUN docker-php-ext-install pdo_mysql mbstring exif pcntl bcmath gd # Get latest Composer COPY --from=composer:latest /usr/bin/composer /usr/bin/composer # Set working directory WORKDIR /var/www Step 3. Setting up Nginx config and Database dump file In root directory create a new directory called docker-compose Now we need two other directories, a nginx directory and mysql directory So we have this two route in our project laravel-project/docker-compose/nginx/ laravel-project/docker-compose/mysql/ In nginx directory create a file called experience.conf we write nginx config in this file like: server { listen 80; index index.php index.html; error_log /var/log/nginx/error.log; access_log /var/log/nginx/access.log; root /var/www/public; location ~ \.php$ { try_files $uri =404; fastcgi_split_path_info ^(.+\.php)(/.+)$; fastcgi_pass app:9000; fastcgi_index index.php; include fastcgi_params; fastcgi_param SCRIPT_FILENAME $document_root$fastcgi_script_name; fastcgi_param PATH_INFO $fastcgi_path_info; } location / { try_files $uri $uri/ /index.php?$query_string; gzip_static on; } } In mysql directory create a file called init_db.init we write mysql initialization in this file like: DROP TABLE IF EXISTS `places`; CREATE TABLE `places` ( `id` bigint(20) unsigned NOT NULL AUTO_INCREMENT, `name` varchar(255) COLLATE utf8mb4_unicode_ci NOT NULL, `visited` tinyint(1) NOT NULL DEFAULT '0', PRIMARY KEY (`id`) ) ENGINE=InnoDB AUTO_INCREMENT=12 DEFAULT CHARSET=utf8mb4 COLLATE=utf8mb4_unicode_ci; INSERT INTO `places` (name, visited) VALUES ('Berlin',0),('Budapest',0),('Cincinnati',1),('Denver',0),('Helsinki',0),('Lisbon',0),('Moscow',1); Step 4. Creating a multi container with docker-compose We need a building three container that should share networks and data volumes. Ok so create a docker-compose file in root directory of project For craete a network for connecting services we define network in docker-compose file like this: networks: experience: driver: bridge App service: app: build: context: ./ dockerfile: Dockerfile image: travellist container_name: experience-app restart: unless-stopped working_dir: /var/www/ volumes: - ./:/var/www networks: - experience DB service: db: image: mysql:8.0 container_name: experience-db restart: unless-stopped environment: MYSQL_DATABASE: ${DB_DATABASE} MYSQL_ROOT_PASSWORD: ${DB_PASSWORD} MYSQL_PASSWORD: ${DB_PASSWORD} MYSQL_USER: ${DB_USERNAME} SERVICE_TAGS: dev SERVICE_NAME: mysql volumes: - ./docker-compose/mysql:/docker-entrypoint-initdb.d networks: - experience Nginx service: nginx: image: nginx:1.17-alpine container_name: experience-nginx restart: unless-stopped ports: - 8000:80 volumes: - ./:/var/www - ./docker-compose/nginx:/etc/nginx/conf.d networks: - experience So our docker-compose file be like this: version: "3.7" services: app: build: context: ./ dockerfile: Dockerfile image: travellist container_name: experience-app restart: unless-stopped working_dir: /var/www/ volumes: - ./:/var/www networks: - experience db: image: mysql:8.0 container_name: experience-db restart: unless-stopped environment: MYSQL_DATABASE: ${DB_DATABASE} MYSQL_ROOT_PASSWORD: ${DB_PASSWORD} MYSQL_PASSWORD: ${DB_PASSWORD} MYSQL_USER: ${DB_USERNAME} SERVICE_TAGS: dev SERVICE_NAME: mysql volumes: - ./docker-compose/mysql:/docker-entrypoint-initdb.d networks: - experience nginx: image: nginx:alpine container_name: experience-nginx restart: unless-stopped ports: - 8100:80 volumes: - ./:/var/www - ./docker-compose/nginx:/etc/nginx/conf.d/ networks: - experience networks: experience: driver: bridge Step 5. Running application with docker compose Now we can build the app image with this command: $ docker-compose build app When the build is finished, we can run the environment in background mode with: $ docker-compose up -d Output: Creating exprience-db ... done Creating exprience-app ... done Creating exprience-nginx ... done to show information about the state of your active services, run: $ docker-compose ps Well in these 5 simple steps, we have successfully ran our application. Now we have a docker-compose file for our application that needs for using in docker swarm. Let’s start Initialize docker swarm. After installing docker in your server *attention: To install Docker, be sure to use the official documentation install docker check docker information with this command: $ docker info You should see “swarm : inactive” in output For activate swarm in docker use this command: $ docker swarm init The docker engine targeted by this command becomes a manager in the newly created single-node swarm. What we want to use is the services of this docker swarm. We want to update our service like app with docker swarm, The advantage of updating our service in Docker Swarm is that there is no need to down the app service first, update the service, and then bring the service up. In this method, with one command, we can give the image related to the service to Docker and give the update command. Docker raises the new service without down the old service and slowly transfers the load from the old service to the new service. When running Docker Engine in swarm mode, we can use docker stack deploy to deploy a complete application stack to the swarm. The deploy command accepts a stack description in the form of a Compose file. So we down our docker compose with this command: $ docker-compose down And create our stack. ok if everything is ok until now take a rest Deploy the stack to the swarm $ docker stack deploy --compose-file docker-compose.yml For example : $ docker stack deploy --compose-file docker-compose.yml staging Probably you see this in output: Creating network staging_exprience Creating service staging_nginx failed to create service staging_nginx: Error response from daemon: The network staging_exprience cannot be used with services. Only networks scoped to the swarm can be used, such as those created with the overlay driver. This is because of “driver: bridge” for deploying your service in swarm mode you must use overlay driver for network if you remove this line in your docker compose file When the stack is being deployed this network will be create on overlay driver automatically. So our docker-compose file in network section be like this: networks: experience: And run upper command: $ docker stack deploy --compose-file docker-compose.yml staging For now you probably you see this error : failed to create service staging_nginx: Error response from daemon: The network staging_experience cannot be used with services. Only networks scoped to the swarm can be used, such as those created with the overlay driver. Get network list in your docker: $ docker network ls Output: NETWORK ID NAME DRIVER SCOPE 30f94ae1c94d staging_experience bridge local So your network has local scope yet because in first time deploy stack this network save in local scope and we must remove that by: $ docker network rm staging_experience After all this run command: $ docker stack deploy --compose-file docker-compose.yml staging Output: Creating network staging_experience Creating service staging_app Creating service staging_db Creating service staging_nginx Now get check stack by: $ docker stack ls Output: NAME SERVICES staging 3 And get service list by: $ docker service ls Output: If your REPLICAS is 0/1 something wrong is your service For checking service status run this command: $ docker service ps staging_app for example And for check detail of service run this command: $ docker service logs staging_app for example Output of this command show you what is problem of your service. And for updating your a service with an image the command you need is this: $ docker service update --image "<your-image>" "<name-of-your-service>" --force That's it your docker swarm is ready for zero down time deployment :))) Last step for have a complete process zero down time deployment is create pipeline in gitlab. Create gitlab-ci In this step we want create a pipeline in gitlab for build, test and deploy a project So we have three stage: stages: - Build - Test - Deploy Ok let’s clear what we need and what is going on in this step . We want update laravel project and push our change in gitlab create a new image of this changes and test that and after that log in to host server pull that updated image in server, and update service of project. For login to server we need define some variable in gitlab in your repository goto setting->CI/CD->VARIABLES Add variable Add this variables: CI_REGISTRY : https://registry.gitlab.com DOCKER_AUTH_CONFIG: { "auths": { "registry.gitlab.com": { "auth": "<auth-key>" } } } auth-key is base64 hash of “gitlab-username:gitlab-password” SSH_KNOWN_HOSTS: Like 192.168.1.1 ssh-rsa AAAAB3NzaC1yc2EAAAADAQABAAABgQCGUCqCK3hNl+4TIbh3+Af3np+v91AyW4+BxXRtHBC2Y/uPJXF2jdR6IHlSS/0RFR3hOY+8+5a/r8O1O9qTPgxG8BSIm9omb8YxF2c4Sz/USPDK3ld2oQxbBg5qdhRN28EvRbtN66W3vgYIRlYlpNyJA+b3HQ/uJ+t3UxP1VjAsKbrBRFBth845RskSr1V7IirMiOh7oKGdEfXwlOENxOI7cDytxVR7h3/bVdJdxmjFqagrJqBuYm30 You can see how generate ssh key in this post: generate sshkey SSH_PRIVATE_KEY: SSH_REMOTE_HOST: root@ This is your variables in gitlab. So let’s back to gitlab-ci In root directory of project create a new file .gitlab-ci.yml and set build stage set test stage And in the last set deploy stage like: stages: - Build - Test - Deploy variables: IMAGE_TAG: $CI_REGISTRY_IMAGE:$CI_COMMIT_REF_SLUG-$CI_COMMIT_SHORT_SHA build: stage: Build image: docker:20.10.16 services: - docker:dind script: - docker login -u $CI_REGISTRY_USER -p $CI_REGISTRY_PASSWORD $CI_REGISTRY - docker build --pull -f Dockerfile -t $IMAGE_TAG . - docker push $IMAGE_TAG preparation: stage: Test image: $IMAGE_TAG needs: - build script: - composer install artifacts: expire_in: 1 day paths: - ./vendor cache: key: ${CI_COMMIT_REF_SLUG}-composer paths: - ./vendor unit-test: stage: Test image: $IMAGE_TAG services: - name: mysql:8 alias: mysql-test needs: - preparation variables: APP_KEY: ${APP_KEY} MYSQL_ROOT_PASSWORD: ${MYSQL_ROOT_PASSWORD} MYSQL_DATABASE: ${MYSQL_DATABASE} DB_HOST: ${DB_HOST} DB_USERNAME: ${DB_USERNAME} DB_PASSWORD: ${DB_PASSWORD} script: - php vendor/bin/phpunit staging-deploy: stage: Deploy extends: - .deploy-script variables: APP: "stackdemo_app" STACK: "travellist-staging" only: - develop needs: - unit-test environment: name: stage .remote-docker: variables: DOCKER_HOST: ssh://${SSH_REMOTE_HOST} image: docker:20.10.16 before_script: - eval $(ssh-agent -s) - echo $IMAGE_TAG - echo "$SSH_PRIVATE_KEY" | tr -d '\r' | ssh-add - - mkdir -p ~/.ssh - chmod 700 ~/.ssh - echo "HOST *" > ~/.ssh/config - echo "StrictHostKeyChecking no" >> ~/.ssh/config - echo -n $CI_REGISTRY_PASSWORD | docker login -u $CI_REGISTRY_USER --password-stdin $CI_REGISTRY .deploy-script: extends: - .remote-docker script: - cp $develop_config /root/project/core - docker pull $IMAGE_TAG - docker service update --image "$IMAGE_TAG" "$APP" --force dependencies: [] Change something in your project and push to gitlab and wait for it To see all pipeline pass like this : And this is beautiful. https://dev.to/holyfalcon/deploy-laravel-project-with-docker-swarm-5oi
0 notes
Text
How to Set Up Laravel 8 on Your Android Phone
Introduction
In today's fast-paced world, mobile devices have become an essential part of our lives, enabling us to stay connected and productive on the go. With the advancement of technology, it's now possible to set up a robust development environment on your Android phone, allowing you to work on projects even when you're away from your desktop. One such platform that empowers developers is Laravel 8, a popular PHP framework for web application development. In this tutorial, we will guide you through the process of setting up Laravel 8 on your Android phone using the Wama technology stack.
Why Laravel 8?
Laravel is renowned for its elegant syntax, powerful features, and comprehensive documentation. Laravel 8, the latest version at the time of writing, brings several improvements and new features that make it even more appealing for developers. Some of these enhancements include Laravel Jetstream for user authentication and scaffolding, enhanced job batching, dynamic Blade components, and improvements to the Artisan command-line interface.
Introducing Wama Technology
Wama technology is an innovative approach that enables you to create a development environment on your Android device. It combines Web Server for Android (WSA), a web server application for Android, with MySQL and PHP, to offer a complete stack for web development. With Wama technology, you can run web applications directly on your Android phone, allowing you to work on projects without the need for a traditional desktop setup.
Follow these steps to set up Laravel 8 on your Android phone using Wama technology:
Step 1: Install Wama Technology Stack
Open the Google Play Store on your Android phone.
Once installed, open the app and follow the instructions to start the server.
Step 2: Download Composer
Open the browser on your Android phone and navigate to https://getcomposer.org/download/.
Download the latest version of Composer.
Step 3: Install Laravel 8
Open the terminal in your Android device (you can use an app like Termux).
Navigate to the root directory of your web server (usually a folder named "htdocs" in the WSA directory).
Use the following command to install Laravel 8:
lua
Copy code
composer create-project --prefer-dist laravel/laravel myproject
Replace "myproject" with your preferred project name.
Step 4: Accessing Laravel 8 on Your Android Phone
Open the browser on your Android phone.
Enter the URL for your Laravel project. It will typically be something like http://localhost:8080/myproject/public/.
You should see the Laravel welcome page, indicating that your setup was successful.
Step 5: Configure the Database
Open the Web Server for Android app and click on the "MySQL" tab.
Open the .env file in your Laravel project and update the database configuration with the values you noted down.
Step 6: Start Developing
Congratulations! You now have Laravel 8 set up on your Android phone. You can start developing your web applications by editing the files in the "myproject" directory.
Tips for Efficient Development
While developing on your Android phone can be convenient, here are some tips to ensure an efficient workflow:
Use a Code Editor: Install a code editor app on your Android device for a better coding experience. Apps like "QuickEdit Text Editor" or "Dcoder, Compiler IDE" can be helpful.
You can set up Git on your Android phone using apps like "Termux."
Testing: Test your web applications on various devices and screen sizes to ensure responsiveness.
Backup: Regularly back up your projects to prevent data loss.
External Keyboard: Consider using an external keyboard for longer coding sessions to improve typing speed and comfort.
Conclusion
In this tutorial, we explored how to set up Laravel 8 on your Android phone using the Wama technology stack. This innovative approach empowers developers to work on web projects even when they are on the move. With the right tools and techniques, you can harness the power of Laravel 8 and create exceptional web applications, all from the convenience of your Android device. Embrace the flexibility and mobility that Wama technology offers and embark on your journey to efficient and productive laravel app development Services.
0 notes
Text
Flex Home Nulled Script 2.54.1

Unlock the Power of Real Estate Listings with Flex Home Nulled Script Are you searching for a dynamic, feature-rich platform to launch your real estate website without the burden of costly licenses? Flex Home Nulled Script is the perfect solution, offering you a professional-grade property listing system absolutely free. This Laravel-based script provides everything you need to build, manage, and scale a multilingual, user-friendly real estate portal—without breaking the bank. What is Flex Home Nulled Script? Flex Home Nulled Script is a premium real estate management platform built with Laravel and designed to empower developers and entrepreneurs. With its intuitive interface, advanced filtering system, and seamless multi-language support, this nulled version offers all the functionalities of the original script—minus the expensive price tag. Whether you're a freelancer, developer, or small agency, this script provides you with an edge in a competitive digital market. Technical Specifications Framework: Laravel 8+ Database: MySQL Language Support: Multilingual (RTL compatible) Admin Panel: Fully responsive dashboard SEO Optimization: Integrated meta tools and schema markup Security: CSRF Protection, input validation, and secure authentication Key Features and Benefits Multilingual & RTL Ready: Perfect for reaching a global audience, including Arabic and Hebrew speakers. Advanced Property Search: Filter by city, status, price, property type, and more. Agent Dashboard: Give agents the tools they need to list, edit, and manage properties seamlessly. Monetization Tools: Charge for premium listings and featured properties with built-in monetization options. Custom Fields: Add new property attributes without touching the code. Mobile Responsive: Optimized for mobile, tablet, and desktop users for maximum reach. How Flex Home Script Can Be Used This script is ideal for: Independent Realtors looking to showcase their listings with a professional website. Agencies aiming to create a multi-agent, scalable real estate portal. Entrepreneurs who want to launch real estate marketplaces in emerging markets without heavy investment. Developers building custom property management platforms for clients. Installation Guide Setting up Flex Home Nulled Script is simple and developer-friendly: Upload the script to your web hosting environment. Create a MySQL database and configure your .env file with the required credentials. Run the installation wizard or artisan commands to finalize the setup. Access your admin panel and start adding listings and categories. No technical expertise? Don’t worry. The admin dashboard is intuitive enough for beginners to handle efficiently. Frequently Asked Questions (FAQs) Is the Flex Home Nulled Script safe to use? Yes, this nulled version has been thoroughly scanned and tested for safety. However, it's always recommended to use it on a secured server and keep regular backups. Can I use this script for a multilingual real estate site? Absolutely! Flex Home Nulled Script supports multiple languages and even RTL layouts, making it perfect for global audiences. Do I need to know coding to use this? No coding skills are required for basic setup and property listing. Developers, however, can easily customize the codebase to fit any advanced requirement. Can I monetize my real estate website with this script? Yes, you can monetize via featured listings, ad placements, and premium packages directly within the admin panel. Why Choose Flex Home Nulled Script? With an extensive feature set, intuitive interface, and support for modern web standards, Flex Home Nulled Script is your gateway to launching a successful real estate platform. Best of all? You can download it for free right from our website—no subscriptions, no hidden fees. Pair it with tools like WP-Optimize Premium nulled for unbeatable performance, and you'll have a winning combination for your online real estate venture.
Final Thoughts Whether you're just starting or looking to expand your real estate offerings, Flex Home delivers powerful capabilities, flexibility, and zero licensing costs. Take the first step in transforming your real estate vision into reality—get your free download today and build with confidence.
0 notes
Text
My Own Blog by Laravel(1)
Make my own blog with Laravel!!
Hi guys, I will make my own blog by Laravel. I'm a Japanese cook in BC. But I don't work now because of COVID-19. So I have much time now. That's why I have started to learn Laravel. I'm not a good English writer. But I will do my best in English. Please correct my English if you would notice any wrong expressions. Thank you!
Anyway, I will post about making a blog by Laravel for a while. Let's get started!
All we have to do
Install Laravel
Create a Project
Database Setting
Migration
Create Models
Seeding
Routing
Make Controllers
Make Views
Agenda
Today's agenda is
Install Laravel
Create a Project
Database Setting
Migration
Create Models
Seeding
Install Laravel
Laravel utilizes Composer to manage its dependencies. So install Composer first if you have not installed Composer yet. Ok, now you can install Laravel using Composer.
% composer global require Laravel/installer
Here we go. So next step is to create a project named blog!
Create a project
Creating a project in Laravel is super easy. Just type a command like below.
% laravel new blog
That's it. So easy. That command bring every dependencies automatically. And you move to blog directory.
% cd blog
Now you can use a new command called 'artisan'. It's a command used for Laravel. For example, you can start server with this command.
% php artisan serve
Do you see command line like this?
% php artisan serve ~/workspace/blog Laravel development server started: http://127.0.0.1:8000 [Mon Apr 20 09:20:56 2020] PHP 7.4.5 Development Server (http://127.0.0.1:8000) started
You can access localhost:8000 to see the Laravel's welcome page! If you want to know the other arguments of artisan, just type like this.
% php artisan list
Then you can see all artisan commands. You can also display the commands for a specific namespace like this.
% php artisan list dusk ~/workspace/blog Laravel Framework 7.6.2 Usage: command [options] [arguments] Options: -h, --help Display this help message -q, --quiet Do not output any message -V, --version Display this application version --ansi Force ANSI output --no-ansi Disable ANSI output -n, --no-interaction Do not ask any interactive question --env[=ENV] The environment the command should run under -v|vv|vvv, --verbose Increase the verbosity of messages: 1 for normal output, 2 for more verbose output and 3 for debug Available commands for the "dusk" namespace: dusk:chrome-driver Install the ChromeDriver binary dusk:component Create a new Dusk component class dusk:fails Run the failing Dusk tests from the last run and stop on failure dusk:install Install Dusk into the application dusk:make Create a new Dusk test class dusk:page Create a new Dusk page class
So let's go to next step!
Database setting
Open .env located under root directory. And edit around DB setting.
DB_CONNECTION=mysql DB_HOST=127.0.0.1 DB_PORT=3306 DB_DATABASE=blog DB_USERNAME=root DB_PASSWORD=
Depends on your database. I use MySQL and I already create database named blog in MySQL. You should create user for only this project when you deploy.
Migration
Laravel supplies the migration system. It allow you to control database using php code. For example, when you want to create database, type the command like this.
% php artisan make:migration create_posts_table
You can see a new migration file database/migrations/xxxx_xx_xx_xxxxxx_create_posts_table.php. Write down columns you need in the function called up() and write down columns you want to delete in down(). Edit it.
public function up() { Schema::create('posts', function (Blueprint $table) { $table->increments('id'); $table->boolean('published'); $table->string('title'); $table->longText('body'); $table->string('tag')->nullable(); $table->timestamps(); }); }
It's ready! Execute this command.
% php artisan migrate
Here we go! Now you got some tables with columns! Let's check them out in MySQL console.
% mysql -uroot
And check tables and columns.
mysql> use blog; Reading table information for completion of table and column names You can turn off this feature to get a quicker startup with -A Database changed mysql> show tables; +----------------+ | Tables_in_blog | +----------------+ | failed_jobs | | migrations | | posts | | users | +----------------+ 4 rows in set (0.01 sec) mysql> desc posts; +------------+------------------+------+-----+---------+----------------+ | Field | Type | Null | Key | Default | Extra | +------------+------------------+------+-----+---------+----------------+ | id | int(10) unsigned | NO | PRI | NULL | auto_increment | | published | tinyint(1) | NO | | NULL | | | title | varchar(191) | NO | | NULL | | | body | longtext | NO | | NULL | | | tag | varchar(191) | YES | | NULL | | | created_at | timestamp | YES | | NULL | | | updated_at | timestamp | YES | | NULL | | | user_id | int(11) | NO | MUL | NULL | | +------------+------------------+------+-----+---------+----------------+ 8 rows in set (0.01 sec)
Good! You could create tables and columns by php. Next step is Create Model.
Create Model
Laravel Framework is MVC application model. MVC is Model, View and Controller. Application works with each role. View works for display to browsers. Controller works as a playmaker. It receives request from router and access databases to get some datas and pass the datas to views. Model connects to the database and gets, inserts, updates or deletes datas.
Now you create a Model.
% php artisan make:model Post
Then you will see the new Post model under app/Post.php.
<?php namespace App; use Illuminate\Database\Eloquent\Model; class Post extends Model { // }
This model has no code. But it's ok. You can leave it for now.
About a model name
A model name is important. A model connects to table of the database with the rule of the name. If you have a posts table, Post model is mapped with posts table automatically.
Seeding
Seeding is very useful function for preparing test datas or master datas. You can use it easily. All you need is just 1. making seeder file and 2. executing it. Let's do that.
Making seeder files
% php artisan make:seeder BooksTableSeeder Seeder created successfully.
Edit seeder files
public function run() { DB::table('posts')->truncate(); $posts = [ [ 'published' => true, 'title' => 'The First Post', 'body' => '1st Lorem ipsum...', 'tag' => 'laravel', 'user_id' => 1 ], [ 'published' => true, 'title' => 'The Second Post', 'body' => '2nd Lorem ipsum dolor sit amet...', 'tag' => 'shiba-inu', 'user_id' => 1 ], [ 'published' => false, 'title' => 'The Third Post', 'body' => '3rd Lorem ipsum dolor sit ...', 'tag' => 'laravel', 'user_id' => 1 ] ]; foreach($posts as $post) { \App\Post::create($post); } }
And edit DatabaseSeeder.php file.
public function run() { // $this->call(UserSeeder::class); $this->call(PostsTableSeeder::class); }
Execute seegding
% php artisan db:seed Seeding: PostsTableSeeder Database seeding completed successfully.
Sweet. Let's check out database.
mysql> select * from posts; +----+-----------+-----------------+-----------------------------------+---------------------------------+---------------------+---------+ | id | published | title | body | tag | created_at | updated_at | user_id | +----+-----------+-----------------+-----------------------------------+-----------+---------------------+---------------------+---------+ | 1 | 1 | The First Post | 1st Lorem ipsum... | laravel | 2020-04-19 19:16:18 | 2020-04-19 19:16:18 | 1 | | 2 | 1 | The Second Post | 2nd Lorem ipsum dolor sit amet... | shiba-inu | 2020-04-19 19:16:18 | 2020-04-19 19:16:18 | 1 | | 3 | 0 | The Third Post | 3rd Lorem ipsum dolor sit ... | laravel | 2020-04-19 19:16:18 | 2020-04-19 19:16:18 | 1 | +----+-----------+-----------------+-----------------------------------+-----------+---------------------+---------------------+---------+ 3 rows in set (0.00 sec)
Perfect! Now we can go next step!
So, see you next time!
References
Installation - Laravel - The PHP Framework For Web Artisans
1 note
·
View note
Text
Seeding Error on Laravel
Received This error “Illuminate\Database\QueryException : SQLSTATE[HY000] [2002] php_network_getaddresses:”
Solution:
Setup hosts file to map docker mysql container to localhost address (127.0.0.1)
I needed to make sure my docker mysql instance was available by it’s container name instead of localhost/127.0.0.1. The .env file also uses the docker container
1 note
·
View note
Text
Step docker install laravel
$ cp .env.example .env # Create required directories $ mkdir storage/framework storage/framework/sessions storage/framework/views storage/framework/cache # Enabling the service. This will include PHP, MySQL, and Nginx. $ docker-compose up -d # Run composer install inside the docker container $ docker-compose exec app composer install # Run DB Migration & DB Seeder if necessary $ docker-compose exec app composer dump-autoload $ docker-compose exec app php artisan migrate:fresh --seed Get IP : docker inspect alpha-gw | grep IPAddress # Verify if the service is up and running correctly. If everything is fine, then it should return OK. $ curl -X GET http://localhost:8096/api/v1/healthz
0 notes
Text
LARAVEL PHP MYSQL
LARAVEL PHP MYSQL
HERRAMIENTAS A USAR XAMPP =CONTIENE TODO EL PAQUETE PHP , MYSQL ENTRE OTROS PHP >8.0 COMPOSER HEIDI GESTOR DE BASE DE DATOS DEBE ELEGIR UN IDE ATOM SUBLIME PHPSTORM VISUAL STUDIO CODE->RECOMENDADO GIT PLANTILLA LTD Antes se debe configurar el archivo .env , que es la configuracion de base de datos. PROCEDEMOS A REALIZAR UN CRUD , PARA PERSONAS . LARAVEL FUNCIONA CON COMANDOS QUE…

View On WordPress
0 notes